
Welcome to the captivating world of homemade wine! I’m Lily Tran, a passionate wine enthusiast and a WSET Level 3, and I’m here to share the joy and artistry of how to make wine from grapes at home.

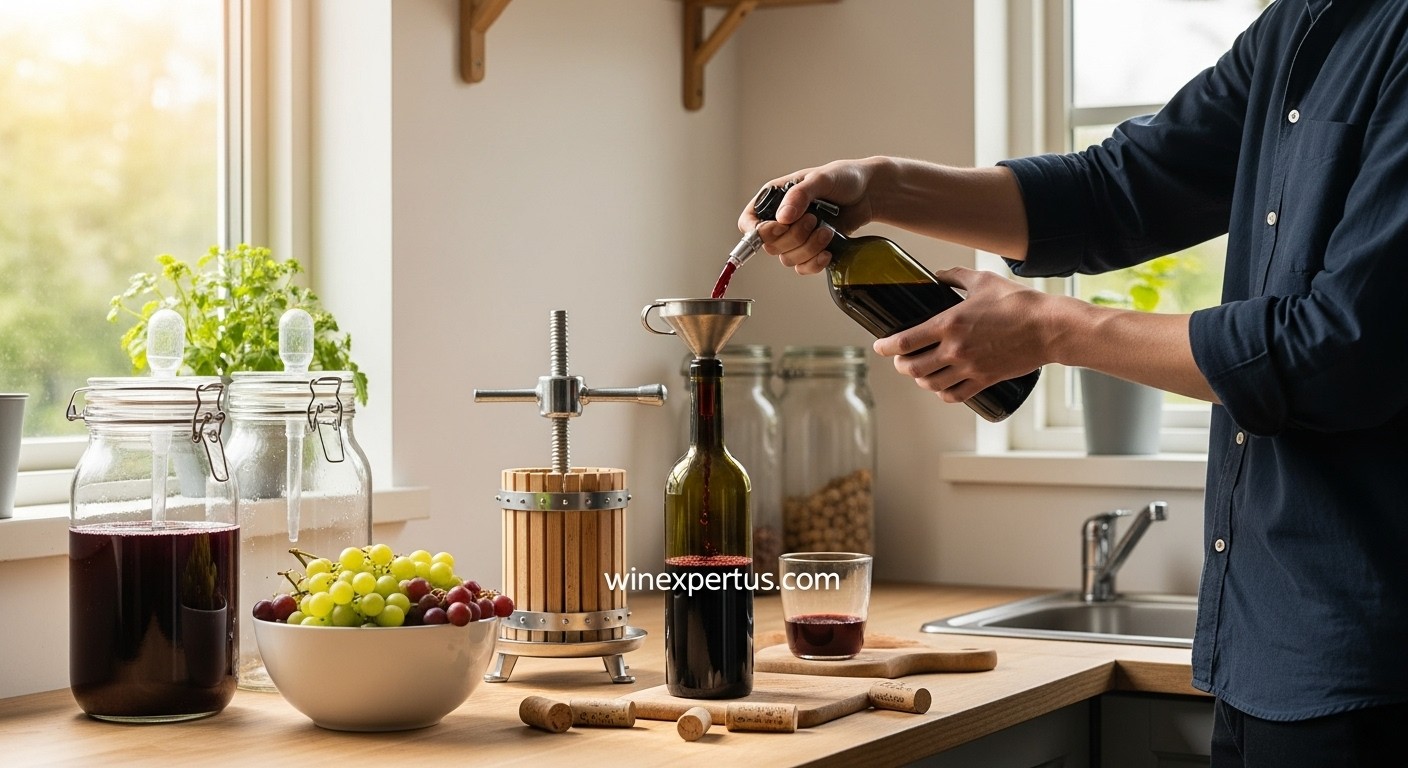
Have you ever dreamed of sipping a glass of wine you made yourself, savoring its unique flavors, and feeling proud of your accomplishment? If so, you’ve come to the right place! This detailed guide will take you from a complete beginner to a confident home winemaker, step-by-step. We’ll explore every secret, from selecting grapes to fermentation, pressing, aging, and bottling. Get ready to transform your kitchen into an exciting mini-winery!
Wine 101: What You Need to Know Before Making Wine
Before we dive into the winemaking process, let’s cover some basics. Understanding the principles will make you much more confident!
What is Fermentation? Why Does Wine “Form” from Grapes?
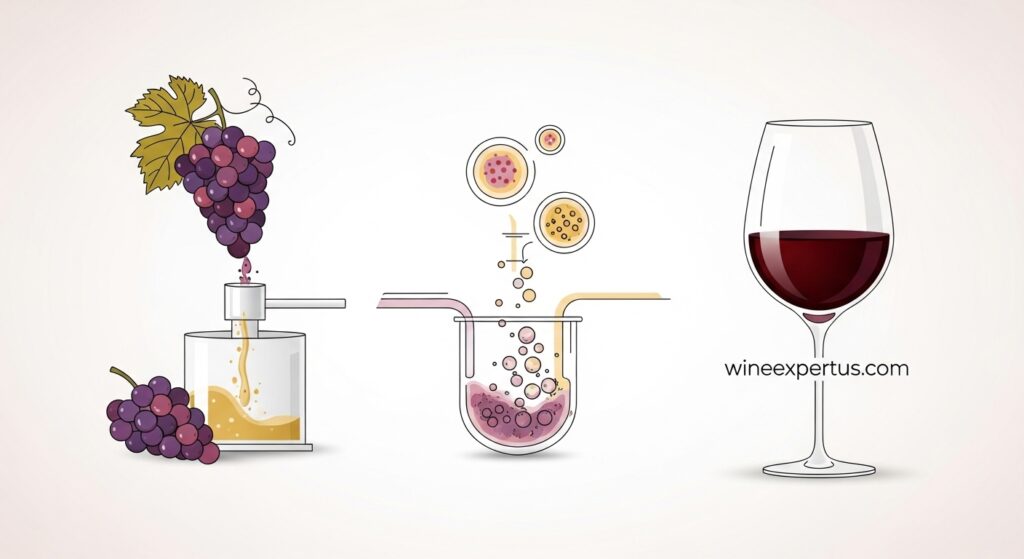
The core of winemaking is the fermentation process. It sounds complex, but it’s actually quite simple: it’s when yeast consumes the sugar in grape juice (called “must”) and converts it into alcohol and carbon dioxide (CO2). The carbon dioxide escapes, and the alcohol remains, creating the wine we love.
Grapes are the perfect raw material for this process because they contain abundant natural sugars, and their skins even host naturally occurring “wild” yeasts (though we usually add cultured yeast for better control). This is the “magic” that transforms fresh grapes into that delightful liquid we call wine!
The Difference Between Red, White, and Rosé Wines
While all wines originate from grapes, the main differences between red, white, and rosé wines lie in how they are processed and fermented:
- Red Wine: Made from red or black grapes. Crucially, the grape skins are left in contact with the juice during fermentation. These skins contain the color pigments (anthocyanins) and tannins that give red wine its deep color, structure, and distinctive flavors.
- White Wine: Can be made from white grapes or even red grapes (like Blanc de Noirs Champagne). The key is that the grape skins are removed before fermentation begins. This results in white wine having a pale yellow or clear color, with fresh fruit aromas and crisp acidity.
- Rosé Wine: An interesting hybrid. Rosé is also made from red grapes, but the skins are only macerated (soaked) with the juice for a short period (a few hours to a few days) to extract a light pink color. The skins are then removed before the fermentation process fully concludes.
Factors Affecting DIY Wine Quality
Homemade winemaking is an art that demands patience and attention to detail. Here are some critical factors that influence the quality of your homemade bottle:
- Grape Quality: Grapes are the soul of the wine. High-quality, ripe grapes with a balanced sugar-to-acid ratio will yield the best wine.
- Sanitation: This is the ABSOLUTE KEY! Any unwanted bacteria or mold can spoil your entire batch. Thoroughly sanitizing your equipment is mandatory.
- Fermentation Temperature: Temperature significantly affects yeast activity and the final flavor of the wine. Each yeast strain and wine type has its own ideal fermentation temperature range.
- Oxidation: While oxygen is essential during the initial stages of fermentation, too much oxygen afterward can spoil the wine, causing it to oxidize and lose its fresh flavors.
- Aging Time: Wine needs time to develop and mature. The aging process allows flavors to meld, tannins to soften, and the wine to achieve its desired complexity.
How to Make Red Wine at Home (Step-by-Step)
Now, let’s roll up our sleeves and get started on making red wine, one of the most robust and captivating types!
Equipment and Ingredients
To begin your red winemaking journey, you’ll need to prepare some basic equipment and ingredients. Don’t worry, most of them are quite easy to find!
Essential Equipment:
- Primary Fermentation Vessel: A large food-grade plastic bucket or stainless steel fermenter with a lid, about 8-15 gallons (depending on how much wine you want to make).
- Secondary Fermentation Vessel (Carboy): A glass or food-grade plastic carboy with a narrow neck, about 5-6 gallons (or more for larger batches).
- Air-lock: A device that allows CO2 to escape without letting oxygen or unwanted bacteria in.
- Stopper/Bung: To seal the carboy’s opening and hold the air-lock.
- Stirring Spoon or Paddle: Made of plastic or stainless steel.
- Straining Bag/Cheesecloth: For filtering grape solids.
- Auto-siphon or Racking Cane: To transfer wine between vessels.
- Corker and Corks: For bottling.
- Clean Glass Wine Bottles: 750ml capacity.
- Hydrometer: Extremely important for measuring initial sugar levels and monitoring fermentation.
- Sanitizer: Such as Star San or a sodium metabisulfite solution.
- Thermometer: To monitor fermentation temperature.
- Grape Crusher (optional): If you have a large quantity of grapes. Otherwise, clean feet can do the job!
- Grape Press (optional): For pressing out juice after fermentation.
Ingredients:
- Fresh Grapes: Approximately 22-33 lbs (10-15 kg) of grapes will yield about 1-1.3 gallons (4-5 liters) of wine. Choose dark-skinned, ripe grapes that are not bruised. Common red wine grape varieties for home winemaking include Cabernet Sauvignon, Merlot, Syrah, Zinfandel, or Concord.
- Wine Yeast: Do not use bread yeast! Choose a yeast strain specifically designed for red wine (e.g., Lalvin EC-1118, Lalvin D47).
- Yeast Nutrient (optional but recommended): Helps keep the yeast healthy and active.
- Pectic Enzyme (optional): Helps break down grape solids, increasing juice yield and making the wine clearer.
- Metabisulfite (SO2 – optional): Used to kill unwanted bacteria and protect the wine from oxidation.
Steps: Crushing – Fermenting – Pressing – Racking – Aging – Bottling
Here’s the fun part! Let’s go through each step to create your own red wine.
Step 1: Crushing the Grapes

- Clean: Gently rinse the grapes under running water to remove dirt and any pesticides (if applicable).
- Destemming (optional): You can remove the stems to reduce unwanted green, bitter flavors, or leave some if you want to add more structure. For beginners, I recommend removing stems completely.
- Crush: Place the grapes in your primary fermentation vessel. Use clean hands (wearing gloves), clean feet, or a grape crusher to crush the grapes. The goal is to break open the skins to expose the juice and pulp, but avoid crushing the seeds as they can release bitter flavors.
- Add SO2 (optional): If desired, you can add a small amount of metabisulfite (around 50ppm) to the crushed grapes to eliminate unwanted bacteria and wild yeast. Mix thoroughly and let sit for a few hours before adding cultured yeast.
Step 2: Primary Fermentation
- Measure Sugar: Use your hydrometer to measure the Original Gravity (OG) of the must. Record this number; it will help you estimate the final alcohol content.
- Add Pectic Enzyme (optional): If using, add it now.
- Activate Yeast: Prepare the wine yeast according to the package directions. This usually involves rehydrating the yeast in warm water (around 86-95°F / 30-35°C) for 15-20 minutes until foamy.
- Pitch Yeast: Add the activated yeast to the crushed grapes. Mix well.
- Cover and Air-lock: Securely place the lid on your primary fermenter (it doesn’t need to be completely airtight at this stage, as you’ll be punching down the cap). Insert the air-lock into the lid.
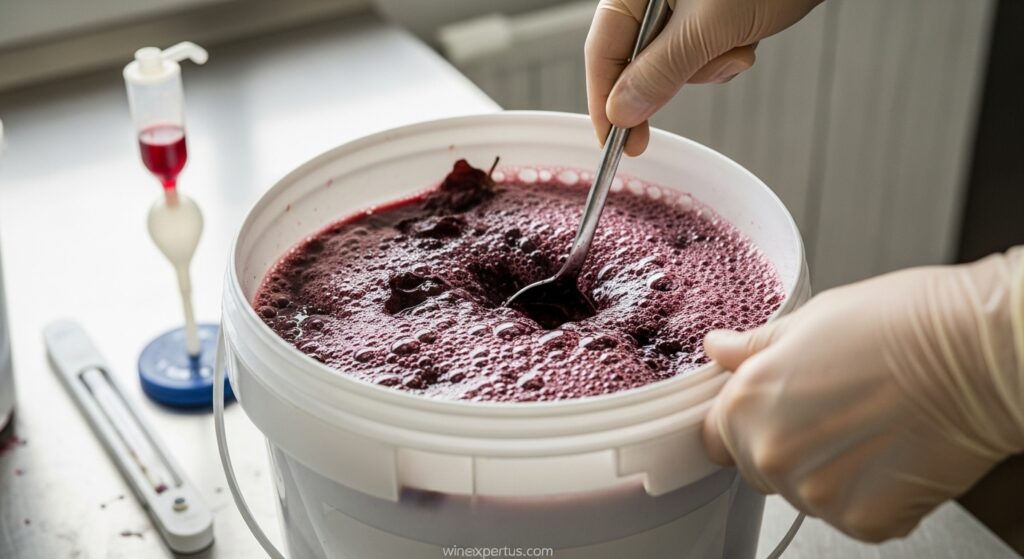
- Primary Fermentation Process: This process is usually vigorous and lasts 5-7 days. The yeast will become active, producing foam and CO2. The grape solids (called the “cap”) will rise to the surface.
- Punch Down the Cap: Important! At least twice a day, use a clean spoon or paddle to push the grape cap down into the liquid. This ensures the skins have good contact with the juice for color and tannin extraction, and prevents mold from growing on the cap.
- Monitor Sugar: Use your hydrometer to check the sugar levels daily. When the specific gravity drops to around 1.000-1.005, or when bubbling significantly slows down, it’s time for the next step.
Step 3: Pressing the Wine
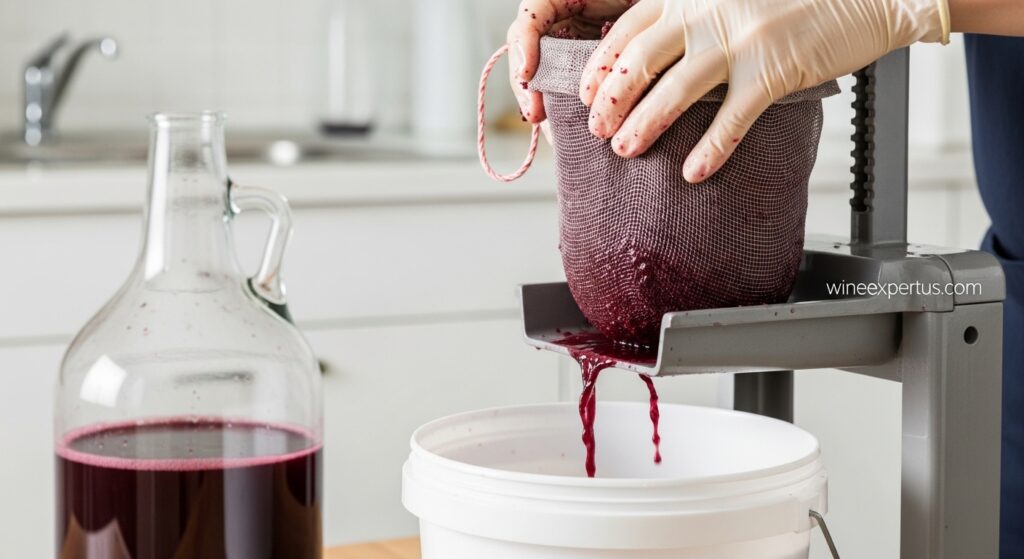
- Once primary fermentation is complete, it’s time to separate the grape solids from the wine.
- Coarse Strain: Use a straining bag or mesh to scoop out the larger grape solids from the fermenter.
- Press: Transfer the remaining grape solids into a grape press (if you have one) and slowly press to extract all remaining wine. If you don’t have a press, you can gently squeeze the solids through a straining bag with clean hands.
- Transfer Wine: Transfer the pressed wine into your secondary fermentation vessel (carboy). Make sure the carboy is filled almost to the top to minimize air exposure.
Step 4: Secondary Fermentation
- Attach Air-lock: Seal the carboy securely with a stopper and air-lock. Fill the air-lock with a bit of sanitized water or metabisulfite solution.
- Aging Period: Secondary fermentation is slower and can last from several weeks to several months. During this stage, any remaining yeast will continue to convert residual sugars, and the wine will begin to mature and its flavors will meld.
- Let it Sit: Place the carboy in a cool, dark place with a stable temperature (around 65-75°F / 18-24°C). Avoid moving the carboy too much.
- Monitor Air-lock: The air-lock will continue to bubble occasionally. When bubbling stops completely and the specific gravity remains stable at 0.995-1.000 for several consecutive days, fermentation is complete.
Step 5: Racking and Clarifying

- First Racking: Once fermentation is complete, you’ll notice a layer of sediment (lees) at the bottom of the carboy. Use your auto-siphon to gently transfer the wine to another clean carboy, being careful not to disturb the sediment. This step is crucial for removing solids and helping the wine clear.
- Second Racking: After about 1-2 months, you can transfer the wine to another clean carboy again to remove any further sediment that has settled.
- Fining (optional): If you want your wine even clearer, you can use fining agents like bentonite or gelatin. Always follow the manufacturer’s instructions.
Step 6: Aging
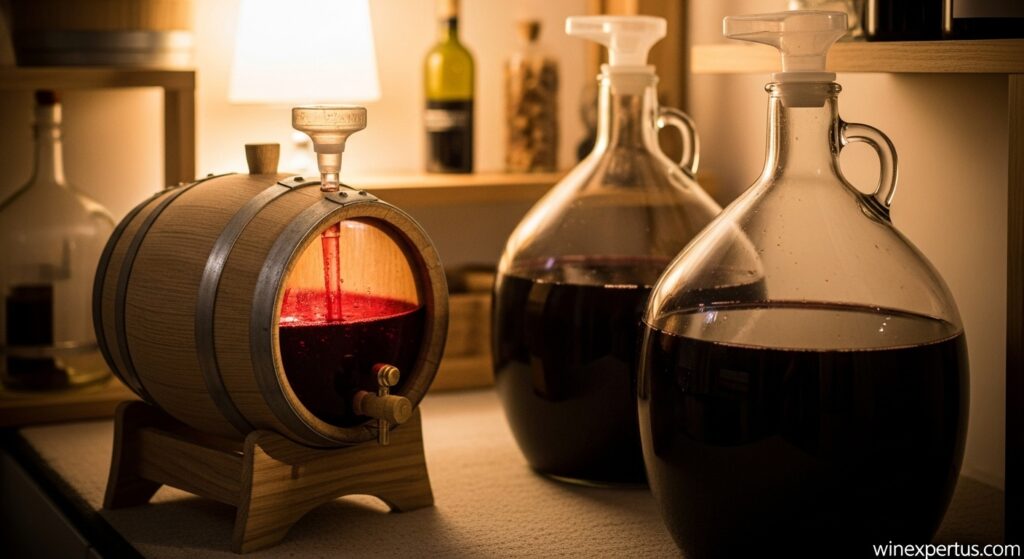
- Aging Time: Red wines often benefit from aging to develop their flavors. You can age the wine in a clean carboy, or even better, in a small oak barrel if you want to impart oak flavors. Aging can last from several months to a year or more, depending on the grape variety and your personal preference.
- Storage: Store the aging vessel in a cool, dark place with a stable temperature. Ensure the air-lock always has water.
Step 7: Bottling

- Sanitize Bottles: Thoroughly wash and sanitize all your clean glass wine bottles.
- Bottle the Wine: Use your auto-siphon to transfer the wine from the aging vessel into the bottles. Fill bottles to about 1 inch (2-3 cm) below the top to allow space for the cork.
- Cork: Use a corker to firmly insert the corks.
- Store: Store bottled wine on its side or slightly angled to keep the cork moist and prevent air from entering. Store in a cool, dark place.
Pro Tips: Temperature Control, Avoiding Mold, Off-Odor Checks
- Temperature Control: For red wine, the ideal fermentation temperature is typically 68-82°F (20-28°C). Too low a temperature can slow or stall fermentation. Too high a temperature can produce off-flavors or kill the yeast.
- Avoid Mold: Sanitation is key! Ensure all equipment that touches grapes and wine is thoroughly sanitized. Punch down the grape cap regularly during primary fermentation to prevent mold growth on the surface.
- Off-Odor Checks: Strange smells in your homemade wine (vinegar-like, sulfur, rotten egg, musty) are signs of a problem. Rotten egg smell can indicate a yeast nutrient deficiency, and a vinegar smell points to acetic bacteria. Trust your nose!
How to Make White Wine at Home (Step-by-Step)
Making white wine has a few key differences from red wine, mainly because we aim to preserve its delicate freshness and fruity aromas.
Differences in Skin Contact, Fermentation Temperature, Avoiding Oxidation
- Skin Contact: This is the biggest difference. For white wine, the grape skins must be removed IMMEDIATELY after crushing or pressing. We only want to ferment the clear grape juice. This ensures white wine has no tannins and a light color.
- Fermentation Temperature: White wine is usually fermented at a lower temperature than red wine, around 50-65°F (10-18°C). Lower temperatures help retain delicate fruit aromas and result in a slower, cleaner fermentation.
- Avoiding Oxidation: White wine is more susceptible to oxidation than red wine because it lacks protective tannins. Extra care must be taken to minimize air exposure throughout the process. Proper use of SO2 (metabisulfite) is crucial.
Simple Recipe for Beginners
Equipment and Ingredients: Similar to red winemaking, but you’ll need a press right from the start.
Steps for Making White Wine:
Step 1: Harvest and Process Grapes
- Harvest: Pick white grapes when they are ripe but still retain good acidity.
- Crush and Press: Gently crush the grapes and immediately press out the juice. Discard the skins, seeds, and stems. The goal is to obtain clear, clean grape juice (must).
- Add SO2 (optional): Add a small amount of metabisulfite to the juice to kill unwanted bacteria and wild yeast.
- Cold Settling (optional): Transfer the juice to a fermenter and chill it down to about 41-50°F (5-10°C) for 12-24 hours. This allows solids to settle to the bottom, helping the wine clear. Then, carefully rack the clear juice to another clean fermenter, leaving the sediment behind.
Step 2: Primary Fermentation
- Measure Sugar: Measure the Original Gravity of the juice.
- Activate and Pitch Yeast: Activate a yeast strain specifically for white wine (e.g., Lalvin K1V-1116) and add it to the juice.
- Control Temperature: Place the fermenter in a cool, stable temperature environment (50-65°F / 10-18°C).
- Attach Air-lock: Seal the fermenter and attach the air-lock.
- Fermentation Process: White wine fermentation is typically slower and longer than red wine, lasting 10-20 days or more. Monitor air-lock activity and specific gravity with your hydrometer.
Step 3: Secondary Fermentation and Aging
- Rack: Once primary fermentation is complete (no air-lock activity, stable specific gravity), gently rack the wine to a clean secondary fermenter.
- Aging: White wines generally don’t require as much aging as red wines. A few weeks to a few months in a clean carboy is often sufficient for the wine to stabilize and develop flavors. Ensure the carboy is full to minimize air exposure.
Step 4: Racking and Bottling
- Racking: Similar to red wine, you can rack the wine to remove sediment. White wines often benefit from more thorough racking to achieve desired clarity.
- Bottle: Sanitize your bottles and bottle the wine. White wines are often enjoyed fresh, so extended bottle aging might not be necessary.
How to Keep White Wine Fresh Longer
- Store Cold: White wine should be stored at cool temperatures, ideally in the refrigerator after opening.
- Limit Oxygen: Always ensure your aging vessel or bottled wine is tightly sealed. Use smaller bottles or a vacuum pump if you have headspace in your containers.
- Proper SO2 Use: SO2 is an excellent preservative for white wine, helping prevent oxidation and microbial spoilage. However, use it at the recommended dosages to avoid a strong sulfur smell.
How to Make Wine at Home Without Fancy Equipment
You don’t need a sprawling cellar or expensive gear to start making wine at home. With a bit of creativity, you can absolutely craft delicious wine using readily available items!
Alternative Solutions: Glass Jugs, Bottled Grape Juice, Bread Yeast (Not Recommended)
- Large Glass Jugs: Instead of a dedicated carboy, you can use large glass jugs with tight-fitting lids (like 5-gallon water cooler jugs or food-grade carboys). Drill a hole in the lid and fit an air-lock.
- Bottled Grape Juice: If you can’t find fresh grapes or don’t have a press, you can buy 100% pure grape juice (no added sugar, no preservatives). This significantly simplifies the crushing and pressing steps.
- Bread Yeast (NOT RECOMMENDED, but possible in a pinch): While I always recommend using dedicated wine yeast, if you’re just experimenting with a small batch, baker’s yeast can ferment sugar into alcohol. However, the final flavor won’t be as refined and might have off-notes.
Simple Guide for Those Who Want to Try
Here’s an extremely simple recipe for absolute beginners, using bottled grape juice:
Ingredients:
- 1 gallon (approx. 3.78 liters) of 100% pure grape juice (no sugar, no preservatives)
- 1 packet of wine yeast (e.g., Lalvin EC-1118)
- 1/2 teaspoon yeast nutrient (optional)
- Metabisulfite (optional, very small amount)
Equipment:
- 1 large 1-gallon glass jug with a lid
- Air-lock and stopper
- Hydrometer (optional but helpful)
- Auto-siphon or racking cane
- Clean glass bottles
Steps:
- Sanitize: Thoroughly wash and sanitize the glass jug and all equipment.
- Prepare Juice: Pour the grape juice into the glass jug. Leave about 4-6 inches (10-15 cm) of headspace at the top.
- Measure Sugar (if using hydrometer): Record the Original Gravity.
- Add Yeast: Activate the yeast according to the package directions and add it to the juice. If using yeast nutrient, add it now.
- Seal and Air-lock: Securely seal the jug with the stopper and attach the air-lock.
- Ferment: Place the jug in a cool, dark place (around 65-75°F / 18-24°C). Fermentation should begin within 24-48 hours; you’ll see bubbling in the air-lock. This process can last 2-4 weeks.
- Rack: When the air-lock stops bubbling for a few days and the specific gravity is stable and low (or you taste it and find it dry and no longer sweet), gently use your siphon to transfer the wine to another clean jug, leaving the sediment behind.
- Age: Let the wine age for another 1-2 months in the clean jug.
- Bottle: Sanitize your bottles and bottle the wine. Let it sit for a few more weeks before enjoying.
With this simple method, you’ll have a decent and fun homemade wine, an excellent stepping stone to explore the world of home winemaking further!
Common Mistakes to Avoid + Pro Tips from Lily
Winemaking is a continuous learning journey. I’ve made these mistakes myself, and I’m here to help you avoid them!
“Classic” Beginner Mistakes (Sanitation – Sugar Ratios – Aging Time)
- Insufficient Sanitation (The Cardinal Sin): This is the biggest and most common mistake. Bacteria and mold can thrive in unsanitized equipment, turning your wine into vinegar or something far less palatable. Always sanitize everything that touches grapes and wine.
- Incorrect Sugar Ratios: Too little sugar, and the yeast won’t have enough “food,” resulting in wine with insufficient alcohol. Too much sugar can shock the yeast or lead to an overly sweet wine. Using a hydrometer to monitor is crucial.
- Not Controlling Fermentation Temperature: Too high a temperature can produce off-flavors (like a hot alcohol taste or solvent notes). Too low a temperature can slow or stall fermentation. Invest in a good thermometer and try to maintain a stable temperature.
- Excessive Oxidation: Too much exposure to air after fermentation can spoil the wine, giving it bruised apple or wet cardboard flavors. Always keep vessels full, avoid unnecessary opening, and use air-locks correctly.
- Bottling Too Early: Bottling too soon, before fermentation is complete or the wine has stabilized, can lead to exploding bottles or unwanted carbonation. Be patient!
Pro Tips: When to Rack? When to Bottle? How to Store?
- When to Rack? You should rack your wine after primary fermentation finishes (to remove the initial yeast lees) and potentially once or twice more during the aging process to remove further settled sediment. Racking helps clarify the wine and prevents off-flavors from dead yeast. If you want truly clear wine, you can use a dedicated filter before bottling, but for beginners, regular racking is often sufficient.
- When to Bottle? Your wine is ready to bottle when:
- Fermentation is completely finished (specific gravity is stable for several days, air-lock activity has ceased).
- The wine has cleared as much as you desire (after several rackings).
- The taste is what you’re looking for – it has mellowed and developed sufficiently.
- Rule of Thumb: Don’t bottle until at least 2-3 months after fermentation has completely stopped and the wine has been racked at least twice.
- How to Store?
- In Fermentation Vessels: Keep the vessel topped up to the neck to minimize air, and always ensure your air-lock has water to prevent oxygen and bacteria from entering. Store in a cool, dark place with a stable temperature.
- In Bottles: After bottling, store wine bottles on their side (to keep the cork moist and sealed) in a cool, dark place away from vibrations. Ideal temperature is around 50-59°F (10-15°C). Avoid direct sunlight or sudden temperature changes.
Frequently Asked Questions (FAQ)
Can I make wine without yeast?
Technically, yes. Grapes naturally have “wild” yeasts on their skins. However, relying on wild yeast is very risky. Fermentation might not start, could stall mid-process, or produce wine with off-flavors due to undesirable yeast strains. For quality and safety, I highly recommend using dedicated wine yeast.
How long does homemade wine take?
The time it takes to make homemade wine varies depending on the type of wine and personal preference, but generally:
- Primary Fermentation: 5-10 days
- Secondary Fermentation and Aging: 1-6 months (or longer for complex red wines)
- Bottle Aging: 1-6 months before reaching optimal drinkability
In total, you can expect anywhere from 2-12 months for a bottle of wine to be ready to enjoy. Patience is key!
What grapes are best for home winemaking?
For beginners, I recommend choosing grape varieties that are known to be forgiving and produce good results:
- For Red Wine: Concord, Zinfandel, Merlot, Cabernet Sauvignon (if you can source high-quality grapes).
- For White Wine: Niagara, Chardonnay, Sauvignon Blanc.
The most important thing is that the grapes are ripe, free from spoilage, and have a balanced sugar and acid content. If you’re buying wine grapes, ask the supplier about their Brix (sugar level).
What’s the alcohol % of homemade wine?
The alcohol content of homemade wine depends on the initial sugar content of the grapes and how thoroughly the yeast converts that sugar into alcohol. With ripe grapes and full fermentation, homemade wine typically has an alcohol content of 10% to 14% ABV (Alcohol by Volume). You can estimate the alcohol content using your hydrometer:
- Measure the Original Gravity (OG) before fermentation.
- Measure the Final Gravity (FG) after fermentation is complete.
- Use the formula or an online calculator to estimate ABV:ABVapproxfracOG−FG0.0075
Final Thoughts from Lily Tran – WSET 3
So, we’ve journeyed together through the exciting process of making wine from grapes at home. From the most basic steps for beginners to expert tips, I hope you’ve found enough inspiration and knowledge to begin your own winemaking adventure.
Remember, winemaking is a blend of science and art. Don’t be afraid to experiment, don’t be afraid to make mistakes, and embrace every moment of the process. There will be times when you encounter challenges, but the feeling of taking that first sip of wine you made yourself, sharing it with friends and family, is an incredibly rewarding experience.
Who knows, maybe from this first bottle, you’ll gradually build an entire home cellar filled with your own handcrafted masterpieces!